HOW TO: Installing FreeBSD with gmirror (software RAID 1) and the GPT partitioning scheme
Last Updated November 14th, 2016: Updated to include that this works under FreeBSD 11.0 as well. Really anything between FreeBSD 9 and 11 should work.
April 30th, 2015: This article is really popular, I’ll do my best to keep it up to date! I’ve added notes about TRIM, alignment and GMIRROR (-h) labeling since it was originally posted.
Note: These instructions have been verified to work for FreeBSD 9.1, FreeBSD 9.2, FreeBSD 10.0, FreeBSD 10.1, and FreeBSD 11.0 .
By default gmirror and the GPT partitioning scheme do not get along. This is because both GEOM (the provider for gmirror) and GPT write meta data at the end of the disk.
Note: Instructions on rebuiling a gmirror with this kind of setup are at the bottom under Testing & Replacing A Failed Disk.
The concept behind this procedure and “work around” is that instead of mirroring the entire disk, you use gmirror to mirror each of your partitions.
The order of these steps is important to avoid corruption. I would only do this on a clean install (and these directions are for that). If you setup a gmirror after the fact on a running machine the gmirror meta data has to get written somewhere, and if you’ve got a file system on it with data, you risk corrupting it and losing data if it happens to be at the end.
To avoid this we’ll setup GPT, create the partitions, create the gmirror providers and finally newfs the appropriate partition. This ensures nothing will get corrupted.
Step 1: Boot The FreeBSD Installer
Start the FreeBSD install process as normal. When you are asked about how you want to partition the disk pick “Shell”.
Step 2: Setup The Partitions
Once inside the shell here are the commands to setup GPT and slice up both disks. These examples assume you are doing this on disk ‘ada0’ and ‘ada1’ (SATA), if you are using SCSI you’d do da0, da1. We also align the partitions to 1 MiB boundaries which will work with 4k (or advanced format) disks, for more information on this read my post about partition alignment under FreeBSD for 4k disks.
# ---- Setup 1st disk
#
gpart create -s gpt ada0
gpart add -s 128k -t freebsd-boot -l boot0 ada0
gpart add -a 1m -s 8G -t freebsd-swap -l swap0 ada0
gpart add -a 1m -t freebsd-ufs -l root0 ada0

# -- Install boot code to first disk
gpart bootcode -b /boot/pmbr -p /boot/gptboot -i 1 ada0

# ---- Setup 2nd disk
#
gpart create -s gpt ada1
gpart add -s 128k -t freebsd-boot -l boot1 ada1
gpart add -a 1m -s 8G -t freebsd-swap -l swap1 ada1
gpart add -a 1m -t freebsd-ufs -l root1 ada1

# -- Install boot code to 2nd disk
gpart bootcode -b /boot/pmbr -p /boot/gptboot -i 1 ada1
Step 3: Setup The Gmirror Providers
Before we proceed we need to have GEOM “re-taste” the partitions so our nice labels show up in /dev/gpt/:
true > /dev/ada0
true > /dev/ada1
You can check to make sure this worked by running:
ls -l /dev/gpt/

# Output should look similar to this:
crw-r-----  1 root  operator    0, 100 /dev/gpt/boot0
crw-r-----  1 root  operator    0, 108 /dev/gpt/boot1
crw-r-----  1 root  operator    0, 102 /dev/gpt/root0
crw-r-----  1 root  operator    0, 110 /dev/gpt/root1
crw-r-----  1 root  operator    0, 104 /dev/gpt/swap0
crw-r-----  1 root  operator    0, 112 /dev/gpt/swap1
Now we can continue to build the mirror providers for each of our partitions:
# -- Build gmirrors
gmirror label -h boot /dev/gpt/boot0 /dev/gpt/boot1
gmirror label -h swap /dev/gpt/swap0 /dev/gpt/swap1
gmirror label -h root /dev/gpt/root0 /dev/gpt/root1
# -- Load the geo_mirror KLD
kldload geom_mirror
# -- Check status
gmirror status
# -- You should see something like this:
Name Status Components
mirror/root COMPLETE gpt/root1 (ACTIVE)
gpt/root0 (ACTIVE)
mirror/swap COMPLETE gpt/swap1 (ACTIVE)
gpt/swap0 (ACTIVE)
mirror/boot COMPLETE gpt/boot1 (ACTIVE)
gpt/boot0 (ACTIVE)NOTE: If you wish to have proper kernel dumps you’ll need to add -b prefer to the gmirror label operation for swap, for example:
gmirror label -b prefer -h swap /dev/gpt/swap0 /dev/gpt/swap1This will reduce performance to the equivalent of a single physical disk as I/O operations will no longer use both simultaneously.
Step 4: Create And Mount The Root (/) Filesystem
Here we actually format the root filesystem, enabling soft updates (-U). I also use “-L root” to set the filesystem label but this isn’t needed. Then we mount the new filesystem in /mnt (which is where the installer expects the target filesystem to be).
If you are using SSDs add the -t option to the newfs call below so that TRIM support is enabled from the start.
# -- For HDDs:
newfs -U -L root /dev/mirror/root
# -- For SSDs:
newfs -t -U -L root /dev/mirror/root

mount /dev/mirror/root /mnt
We now need to create the fstab file which will be put into place by the installer:
vi /tmp/bsdinstall_etc/fstab# Device Mountpoint FStype Options Dump Pass#
/dev/mirror/swap none swap sw 0 0
/dev/mirror/root / ufs rw 1 1Exit out of the partitioning shell to resume the setup:
exitStep 5: Resume The Setup
Continue through the rest of the install as you normally would do. At the very end when you exit the installer you will see the prompt below:
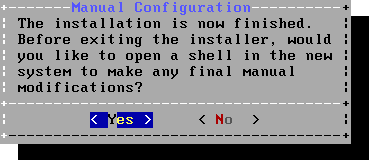
Pick Yes.
Step 6: Final Configuration
Inside this shell we just need to set a few last minute things to make sure our new OS loads GEOM on boot and also reports the mirror status in the daily report emails.
# -- Make sure gmirror module comes up on boot
echo 'geom_mirror_load="YES"' >> /boot/loader.conf

# -- Enable daily status reporting
echo 'daily_status_gmirror_enable="YES"' >> /etc/periodic.conf
And that’s it! Exit out of this shell:
exitAnd reboot!
Addendum: Testing & Replacing A Failed Disk
To test your gmirror you can pull a disk out of a gmirror and the server should log a message in dmesg(8) but otherwise function normally. When you re-insert the disk it will rebuild automatically as gmirror will recognize it (be sure to let it rebuild fully before yanking another disk).
If you have a failed disk that needs replacing simply remove it and insert the new disk of the same size or greater (gmirror will only use the original size though). If your hardware supports hot-swap this can be done while the server is running. With the new disk in place we’ll need to re-partition in like we originally did above, tell gmirror to forget the old disk’s partitions and add the new disk’s partitions to the mirror containers.
Let’s assume for this example that ada1 has failed. Once the new disk has been inserted you’ll first want to make sure it’s blank by running:
gpart show ada1If anything but a blank listing comes up (and your replacement disk is new) think long and hard! Make sure you’ve got the correct disk and device name!
If you are using a recycled disk that isn’t blank, first blank out it’s partition (again, double check the device name!):
gpart destroy -F ada1Now we’ll partition the disk the way the originals are (above), adjust for any differences in your own partitioning:
gpart create -s gpt ada1
gpart add -a 1m -s 128k -t freebsd-boot -l boot1 ada1
gpart add -s 8G -t freebsd-swap -l swap1 ada1
gpart add -t freebsd-ufs -l root1 ada1
gpart bootcode -b /boot/pmbr -p /boot/gptboot -i 1 ada1
Have FreeBSD re-taste the /dev/gpt/ device names:
true > /dev/ada1
ls -l /dev/gpt/
This is not needed for FreeBSD 10 and later
Now for each parition tell gmirror to forget any disk’s partitions which aren’t currently present and add the new partitions to become mirrored (remember we’re gmirroring each parittion individually instead of each disk so GPT can work happily with gmirror):
gmirror forget boot
gmirror insert -h boot /dev/gpt/boot1

gmirror forget swap
gmirror insert -h swap /dev/gpt/swap1

gmirror forget root
gmirror insert -h root /dev/gpt/root1
Finally check the status of the rebuild:
gmirror statusMore information can be found at the FreeBSD Handbook’s page on RAID1 mirroring.
Need help with Linux or FreeBSD infrastructure?
A-Team Systems provides engineer-led support for production Linux and FreeBSD environments, including troubleshooting, operational oversight, and ongoing infrastructure management.
Contact A-Team Systems